Fruiting Your Substrate
Fruiting is the process of forcing the substrate to produce “fruit bodies”, otherwise known as the actual mushrooms themselves.
Once your substrate is fully colonized you will need to decide how you want to fruit it. This can be achieved by leaving the substrate in the bag to fruit or moving it to an external location like a plastic tote, terrarium or mono tub. Usually fruiting the substrate in a tote will result in a larger yield because the substate will have more surface area and head room to produce fruit bodies. This method requires additional steps and equipment to achieve as well as a clean and sterile growing environment. It is recommended that one has a few harvests under their belt before attempting this method.
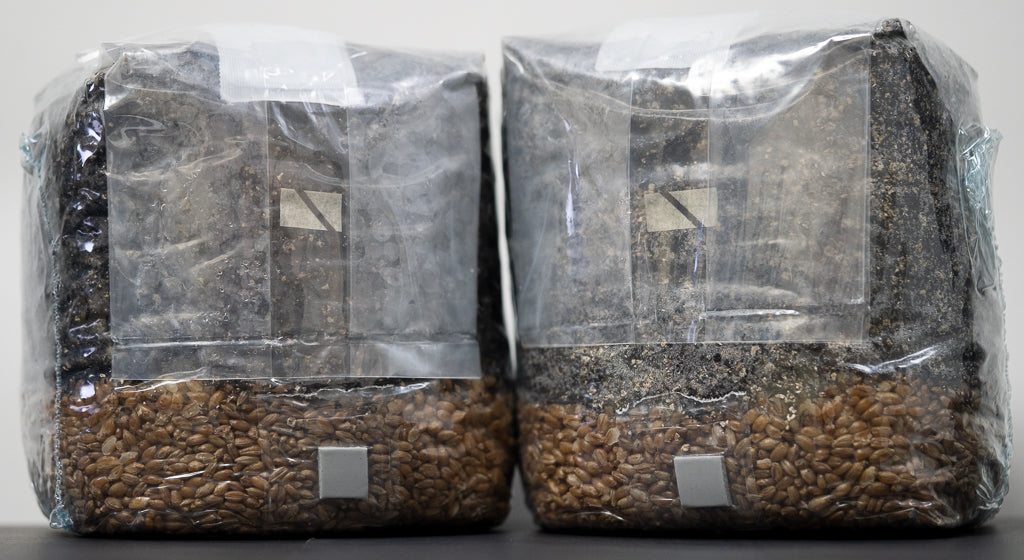
Fruiting in the Myco Bags
If you plan on fruiting the kit in the bag, you will want to open the bag to give the substrate some fresh air once it is fully colonized. Then you may need to mist the substrate with clean or distilled water if it appears to be drying out. Fold the bag shut to hold in moisture. This can be done with some clean tape or a paper clip. Drop the temperature to induce fruiting. This is usually around 70-75 degrees. You will need to look into the specific species of mushroom you are cultivating to find out what the fruiting temperatures are. Open the bag once a day or every other day to give the substrate fresh air.
The three factors that will take the substrate from a vegetative stage to a fruiting stage are temperature, oxygen level and humidity. Controlling all of these at the right time will cause the substrate to fruit. it usually takes about 2 weeks (10-16 days). Once the kit starts to fruit you will see tiny mushrooms or “pins” forming on the substrate. As the pins develop and grow upward you may need to open the bag to make more room for the growing mushrooms. Once the mushrooms are fully grown, harvest them and fold the top of the bag closed. This is to prevent the substrate from drying out. Mist the substrate to rehydrate if necessary. More fruits should continue to grow in the coming weeks.
Q: What size tote do I need?
A: We have found that most people use anywhere from a 20-50 quart tote. However, this will depend on the measurements of the tote, are you are breaking your substrate up or leaving it as one solid cake? If breaking it up, you need to decide how thick you want your substrate layer to be. 2-3 inches is pretty standard. If you measure the length, width and height of the tote you will find out how may cubic inches it is. Then measure the length and width and depth you want your substrate layer to be. Our 5 LB kits measure 7.5'' high x 6'' wide x 4'' deep which is 180 cubic inches, or 3.17 quarts. From this you can determine what size tote you will need.
In the past we have used 107 quart totes to hold 20 lbs of compost.
Building a Simple Fruiting Chamber:
As stated above at this point in the growing process, it is necessary to change three factors, humidity, oxygen levels and temperature. Temperature should be lowered, oxygen and humidity levels should be increased. The humidity level needs to be as close to 100% as possible. There are dozens of plans available on the Internet on how to build a fruiting chamber, and this is one of the simplest ways. You will need the following items:
- A clear plastic tote preferably with a clear plastic lid. Anything from 30-60 quarts should be fine. You will need to drill about a dozen or so 1⁄4’’ holes in each side for fresh air exchange.
- 1-2 gallons of perlite. This can be found at your local gardening or mega store.
- 1-2 gallons of distilled or spring water
- A spray bottle
- A thermometer and a hydrometer.
1. Pour the perlite in the plastic tote, and spread it out evenly. You want a 2-3 inch layer at the bottom.
2. Fill with approximately one half, to one gallon of water. Mix the water and perlite until it has the consistently of oatmeal. You do not want the water level to rise above the perlite. It also helps to add a few tablespoons of rubbing alcohol or peroxide to help keep the water sterile.
3. Place the hydrometer in the terrarium. It should take about 24 hours for the tank to reach 95% humidity. If needed use a spray bottle to add moisture to the fruiting chamber, but do not spray the substrate directly with water.
4. When you are ready to place the trays into the fruiting chamber, remove their lids so they can get plenty of air.
5. Mushrooms require light for different reasons than plants. They only require 4 to 6 hours of indirect light per day. If the plastic tote is not placed in an area that will receive indirect light, use a low wattage light, placing it adjacent to the fruiting chamber, as a lighting source.
6. Once again, ensure that the fruiting chamber will be placed in an area that will be between 70 and 76 degrees, which should be normal room temperature.
7. It is best to disturb the fruiting chamber or remove the lid as little as possible, but the cakes do need fresh air to produce fruit bodies, so if desired, once a day, or every other day you can remove the lid and fan the cakes to help excess carbon dioxide build up.
8. At this point in the growing process the mushroom mycelium should be pretty well established, and not that vulnerable to contaminates, but mold can and will grow in the terrarium if not well maintained. After 14 to 16 days, you should notice the beginnings of fruit bodies growing. Depending on what species you are growing, a mushroom can grow from a small pin to a full mushroom in as little as 48 hours from this point.
9. Once your trays are full of mushrooms, pick them by gently twisting them at the base. You want to be careful not to destroy the roots. This will be your first “flush.” Leave the aluminum trays in the fruiting chamber because more fruit bodies will continue to grow in the next few days. Each tray should flush 2 to 4 times before the mycelium is “spent.”
Q: How many mushrooms will a kit produce?
A: There is no real way to answer this question. There are a number of factors that come into play that will effect your overall yield such as what species of mushroom you intend on cultivating, the strength and resilience of the strain. Are you are starting with spores or a liquid culture? are you growing indoors or outdoors? what time of year do you plan on growing? the temperature you incubate the culture at, whether or not you intend on fruiting your culture in the bag or if you are using some kind of fruiting chamber or terrarium, are you adding a casing layer or bulk substrate, the humidity and oxygen levels etc…
We grow oysters and shiitakes on 10lb blocks of compost and we can usually expect to get 6-7 pounds of fresh oysters or 4-5 pounds of fresh shiitakes pre block of compost over the course of about 30-45 days. We have let compost sit for several weeks and have still received regular flushes. You can yield larger harvests if you let your substrate fruit for longer periods of time.
We have had kits that produce far more than expected and sometimes we have had kits become contaminated and not produce anything. We have been in business for over 10 years and the whole process of mushroom growing can still throw you a curve ball every now and then. If you are using a 5lb kit you can expect less than half of these amounts. If you intend on drying your mushrooms dried weight can be anywhere from 3-10% of the wet weight depending on the species.
Basically you will have to come up with your own set up, system and do what works best and feels right to you. There are many different ways to grow mushrooms. There really is no “prefect” or “fool proof” method. We sell these kits and substrates because we use them on a regular basis and we know they work best for our needs.